

If you can snap a picture, you can scan documents! It’s quick and easy
If you have a preferred app to do this already, great! If you don’t, find one that you like best - there are many out there.
Information for Microsoft’s ‘Office Lens’ is included below. It is available for both Apple and Android devices, and does not require an account.
TIPS
PLEASE DO NOT SEND A SERIES OF PICTURES – PLEASE FOLLOW THE GUIDE TO CREATE A PDF DOCUMENT
When shooting the page, having a border is good – don’t try to only snap the sheet of paper.
Place the page on a contrasting surface – try not to put a white sheet on a white countertop.
Try to have a light source above and in front of you – don’t have the light behind you, casting a shadow on the page.
Black and white is preferred over color, unless color is necessary to properly convey the information on the page.
TRICKS
To get good, even light, put the documents on a surface between you and a window during the day.
If you have many sheets of paper and a contrasting surface, you may be able to speed up the capture process by turning off Manual Border Adjustments toggle in the upper right hand corner.
You should upload your files HERE.
Email is not as secure for sensitive documents like those with Social Security or Bank Account numbers.
HOW-TO: Apple Devices
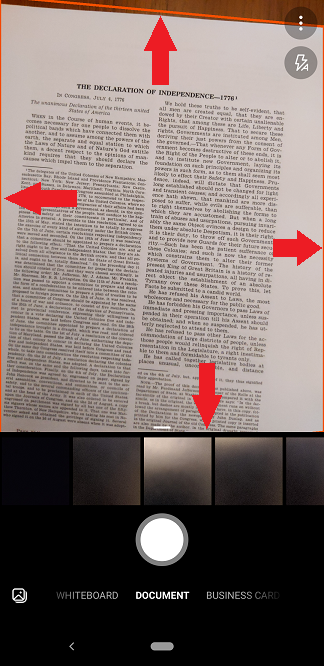
Good framing versus bad framing - don’t be afraid to have some surface showing, the app will get rid of it for you!
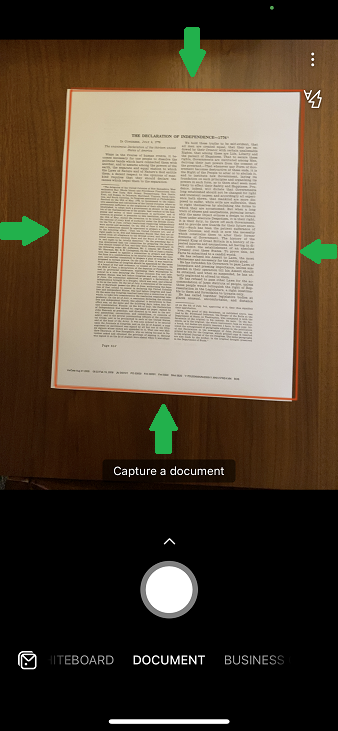
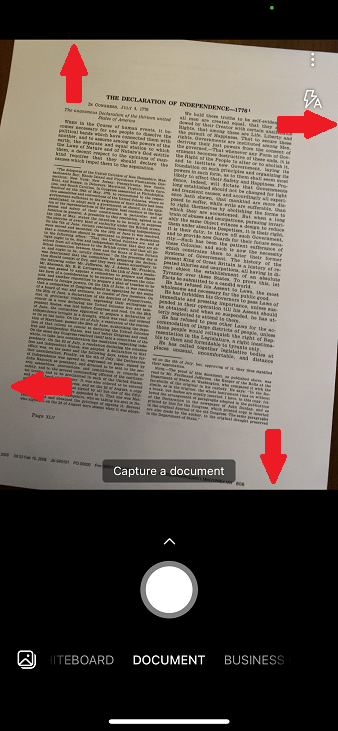
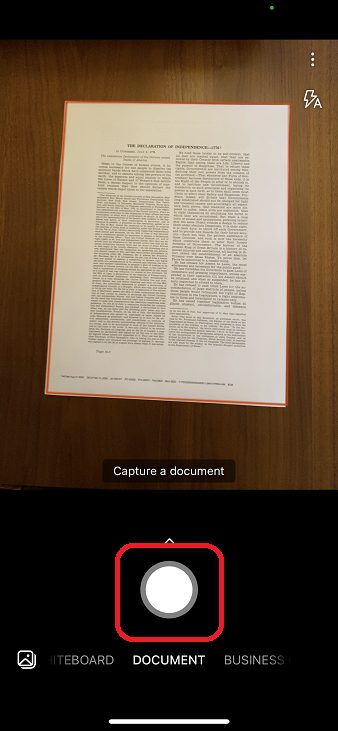
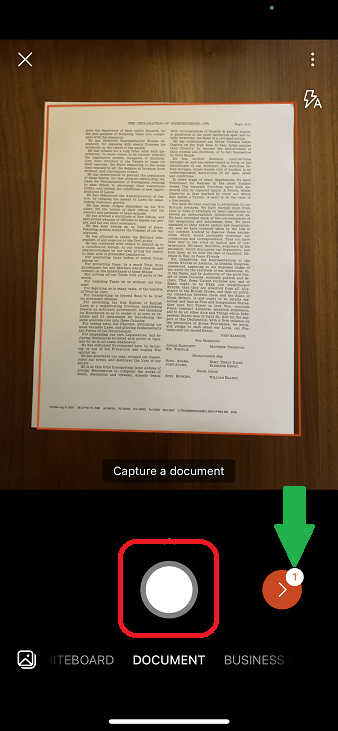
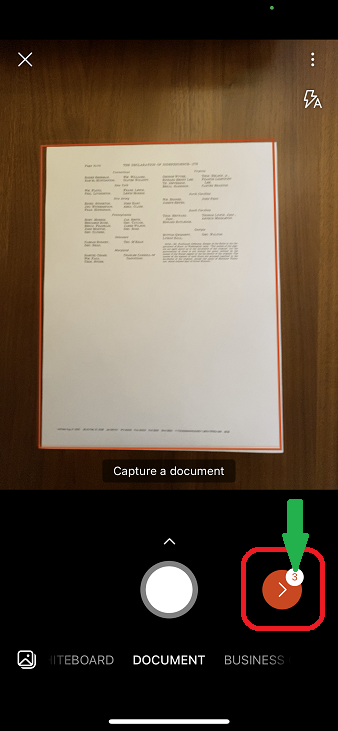
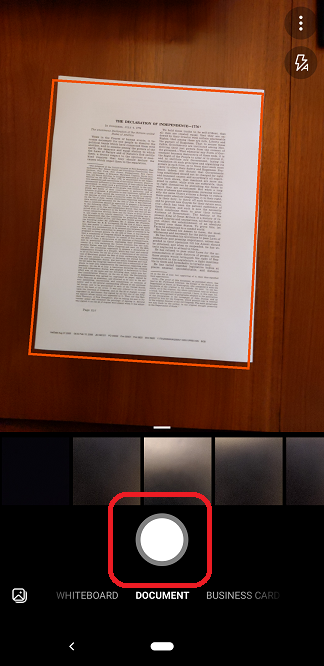
STEP 1: Place the first sheet down, square it up the best you can, and click the CAPTURE button.
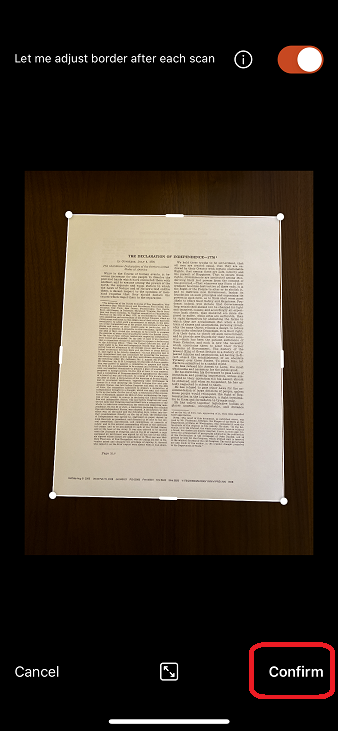
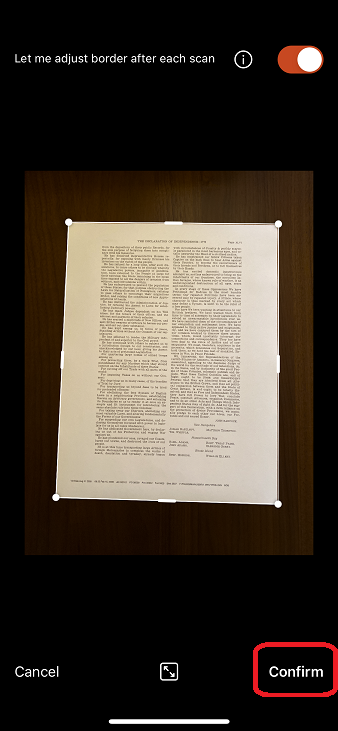
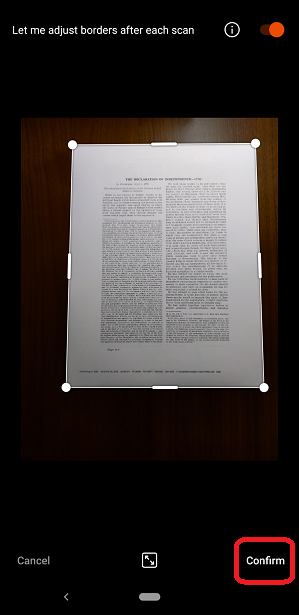
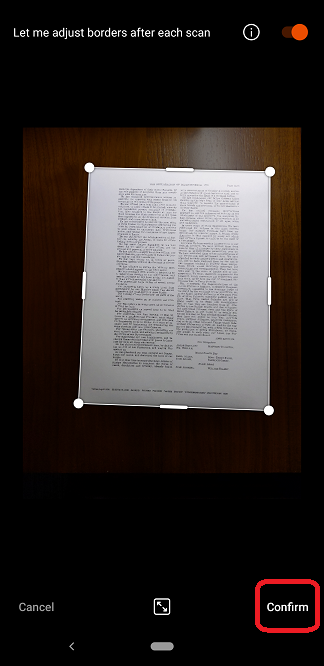
STEP 2: You will get a preview of the image. If it looks good, click the CONFIRM button.
This will crop it to the border outlined and square things up for you automatically. Use the dots to adjust if necessary.
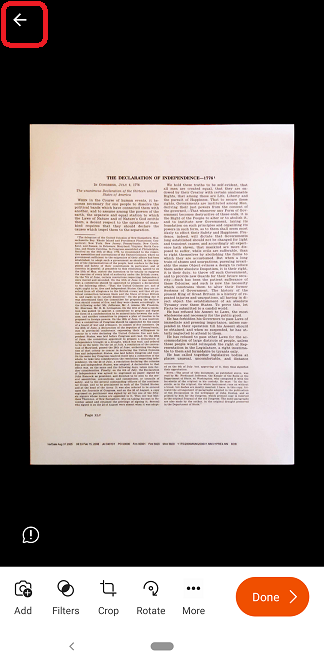
STEP 3: *IMPORTANT* If you have multiple sheets, click the BACK ARROW in the upper left, otherwise, skip to Step 11.
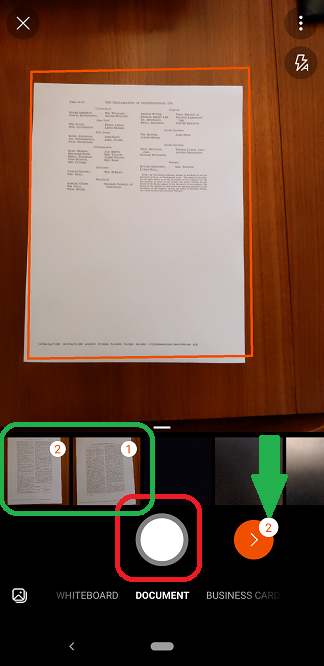
You should now have a live preview of your camera and a little “1” bubble on the red right arrow in the lower left.
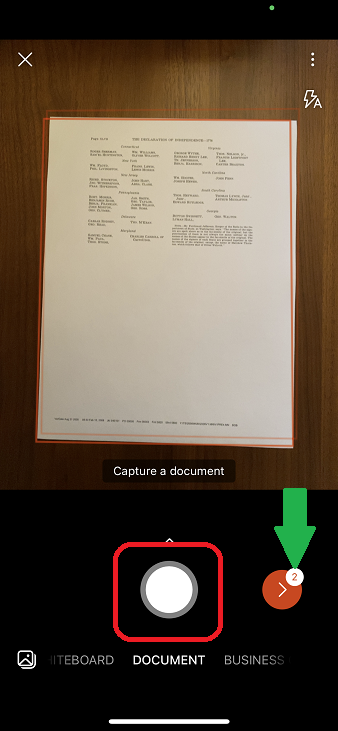
STEP 4: Now flip to your next sheet of paper and tap the CAPTURE button again.
STEP 5: If the preview of page 2 looks good, click CONFIRM button again.
Step 6: Now it will take you directly back to the live preview to CAPTURE your next sheet of paper.
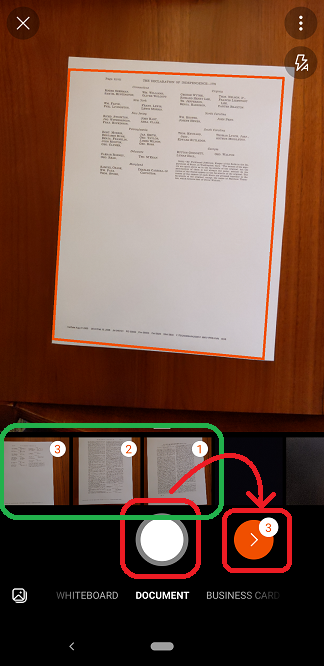
Step 7: Keep CAPTURING and CONFIRMING until the little NUMBER BUBBLE matches the number of sheets you want to scan.
You will now have a preview of all your captured pages together.
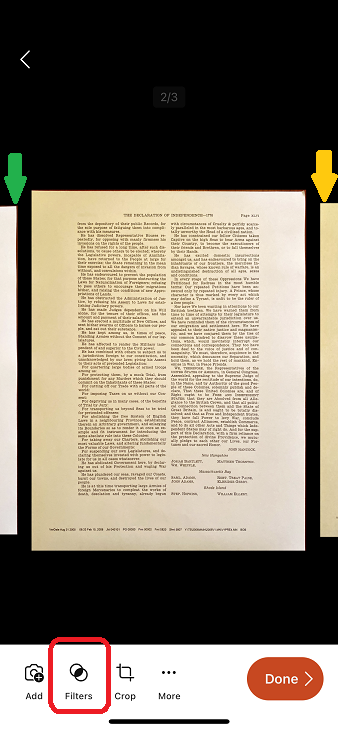
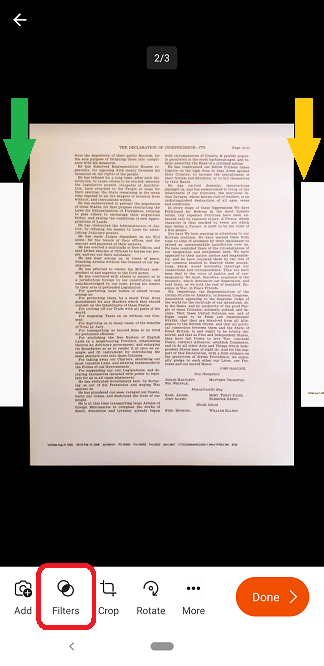
STEP 8: Most likely, you will need to select the FILTERS option in the lower tray to do some color-correcting.
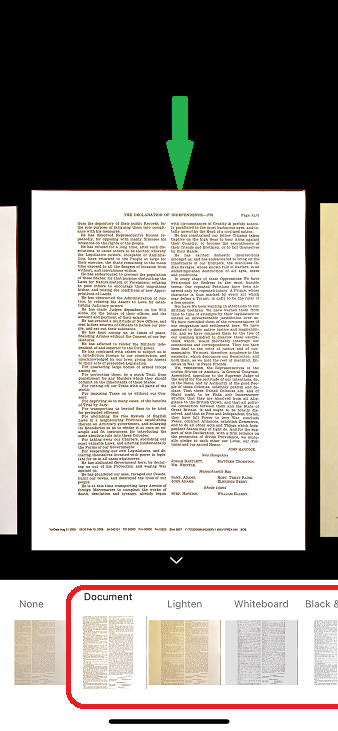
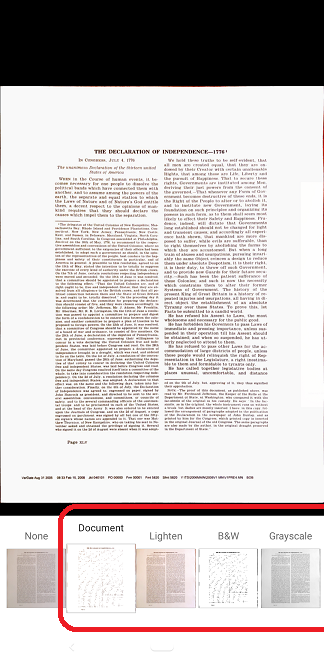
STEP 9: You can select from many options to best suit your document’s needs, but DOCUMENT or BLACK AND WHITE will most likely give you the best results. Set the filter for each sheet you have scanned.
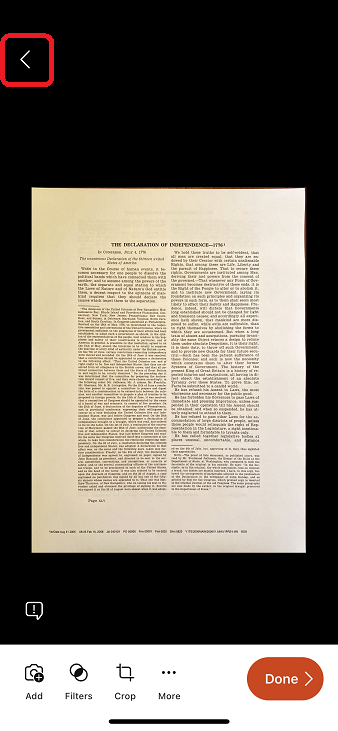
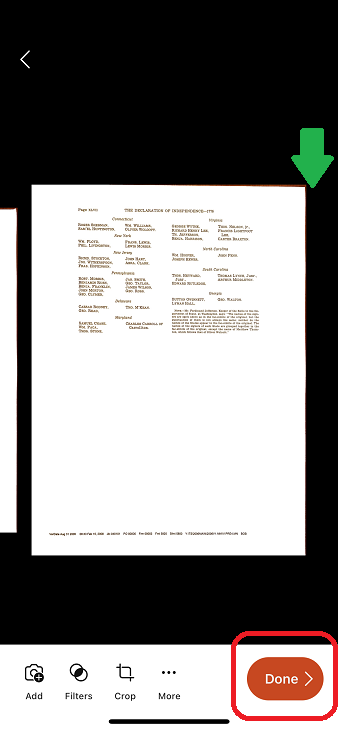
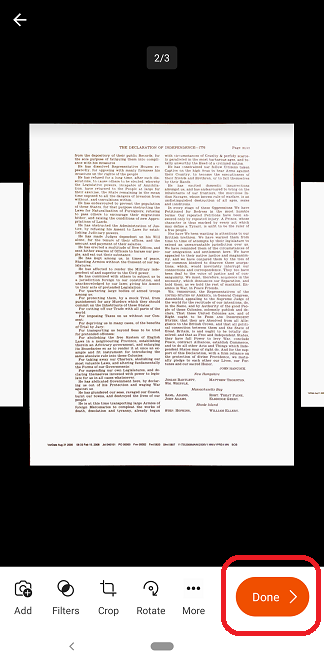
STEP 10: Once you’ve filtered the last page, select the DONE button in the lower right to start saving your document to your phone or tablet.
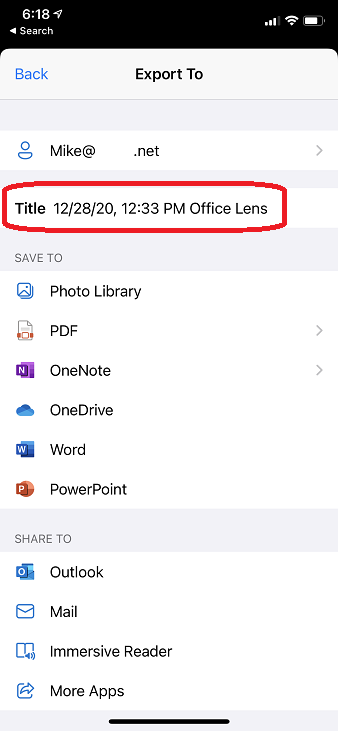
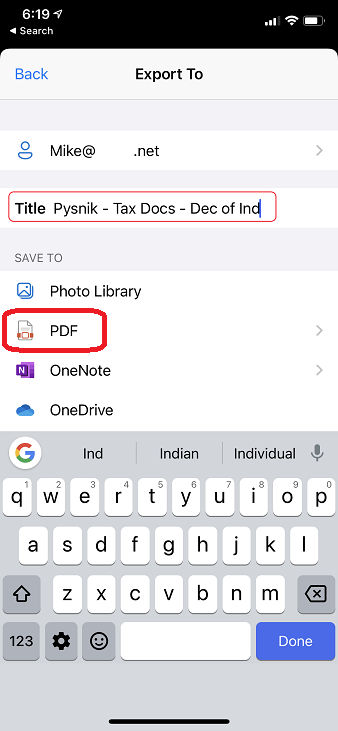
STEP 11: Now you will give your FILE A NAME - including your last name and a short description of the PDF is ideal (Smith - 2020 Tax Documents).
STEP 12: *IMPORTANT* Now select the PDF option.
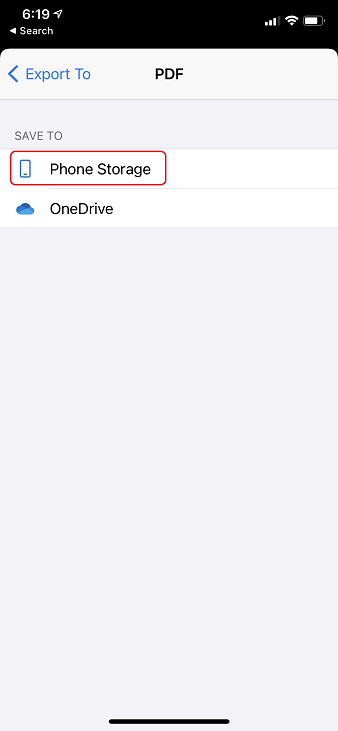
STEP 13: Next select PHONE STORAGE to save it to your device, within the Lens app.
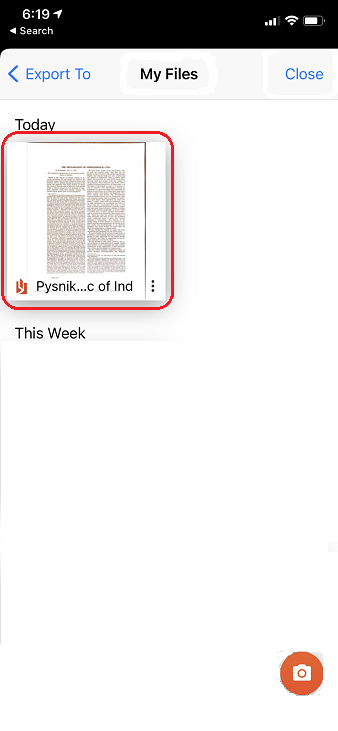
Now you will save a copy outside the Lens app, on your phone’s File system so you can then access it and upload it.
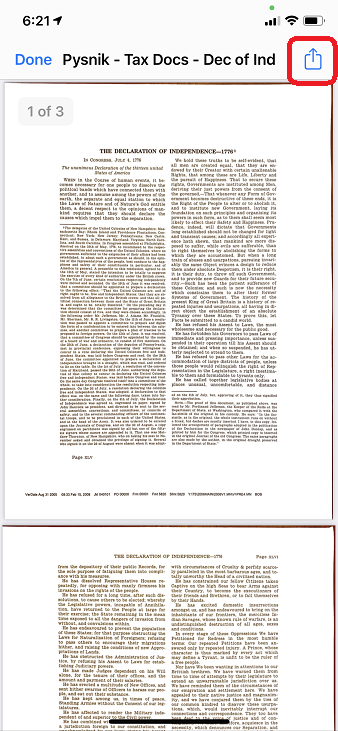
STEP 14: Tap the image of the PDF file you just made.
STEP 15: Tap the SHARE icon (box with an up arrow) in the upper right.
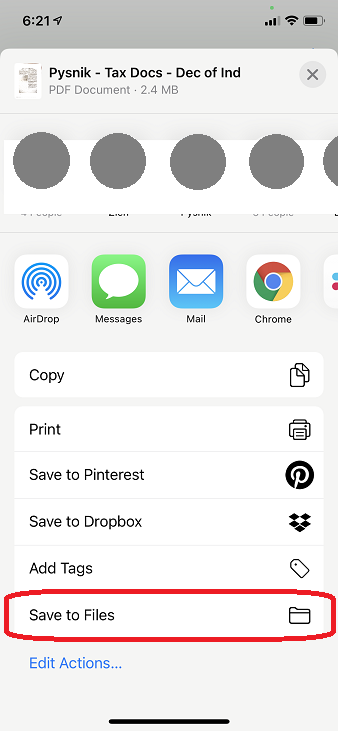
STEP 16: Select the SAVE TO FILES option below. (You may have to swipe up on the menu tray to show more.)
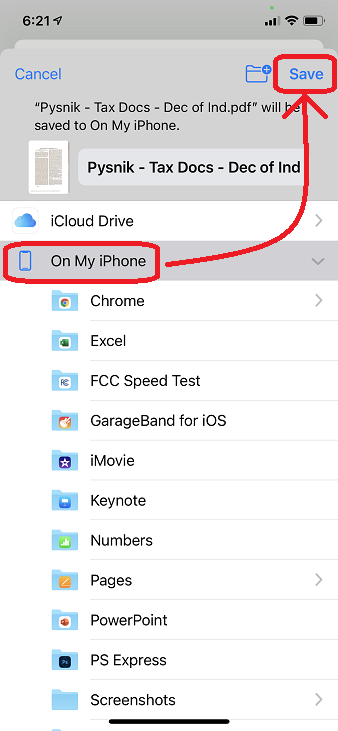
STEP 17: Select the ON MY iPHONE (or iPAD) to make it grey, then tap SAVE in the upper right.
STEP 18: Now you will see your documents again - tap DONE and close the app.

Now that you have saved it to your phone or tablet, you can upload it to the Pysnik Financial FILE DROP.
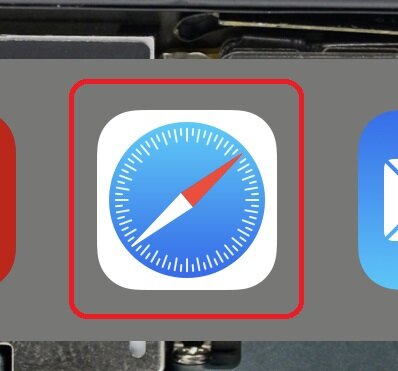
STEP 19: Open SAFARI or your web browser of choice.
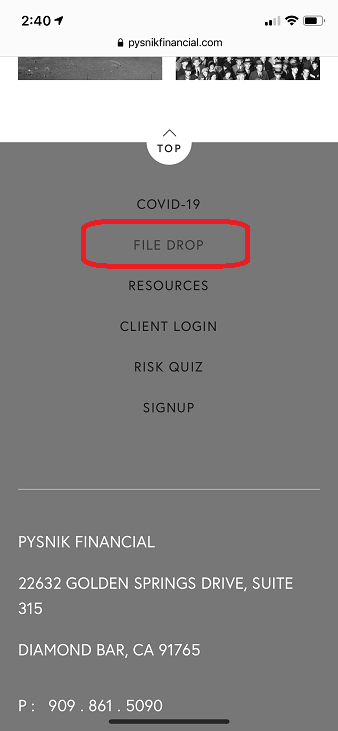
STEP 20: Go to PYSNIKFINANCIAL.COM and scroll down to the grey footer and tap on the FILE DROP link.
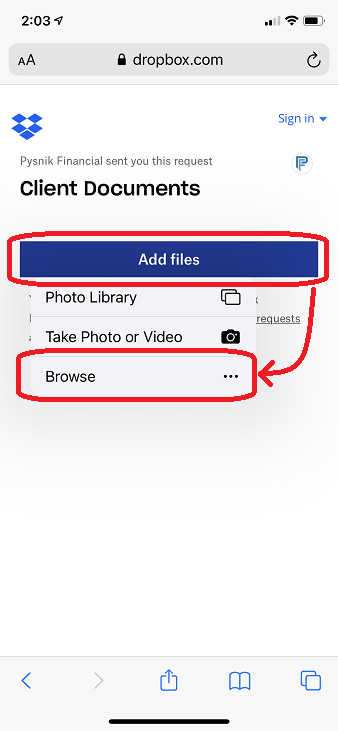
STEP 21: On the Dropbox website with the PF logo on it, select the blue bar that says ADD FILES and tap BROWSE from the pop-up menu.
Now you need to find where you saved the PDF you created from the Lens app.
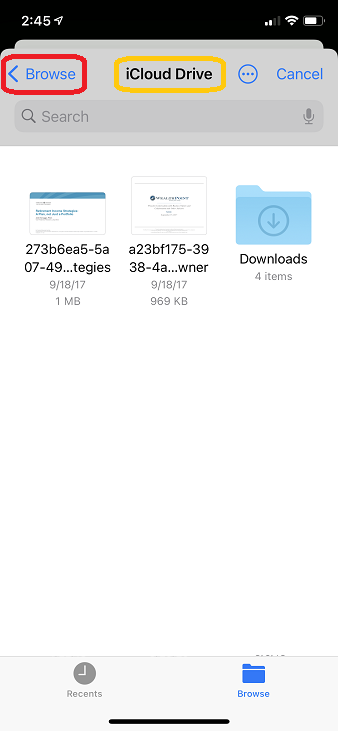
STEP 22: If you don’t immediately see it you should tap the < BROWSE button in the upper right to exit the iCloud Drive folder.
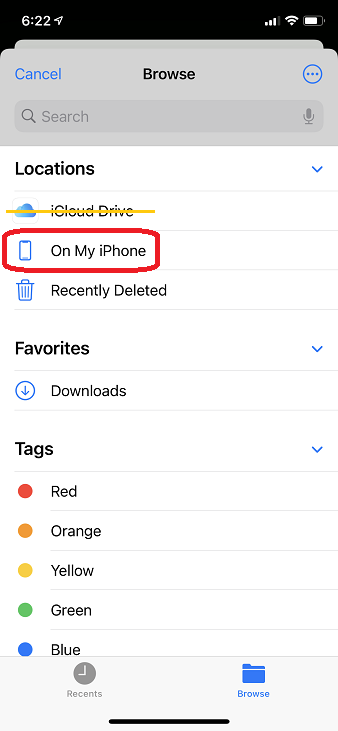
STEP 23: Now you should see and tap on the ON MY iPHONE (or iPAD) option within Locations.
STEP 24: Now you should see the file you saved from Lens to your device, tap on YOUR FILE(S) to attach them.
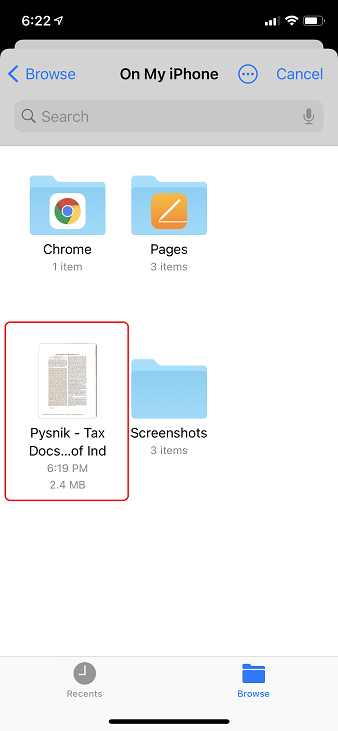
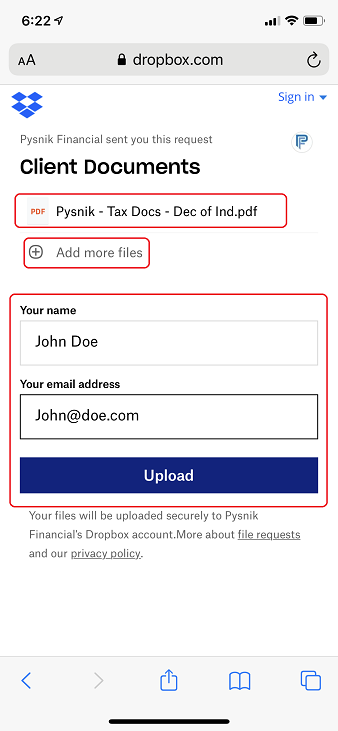
Now you should see your file(s) listed - you can go back and select additional files if needed.
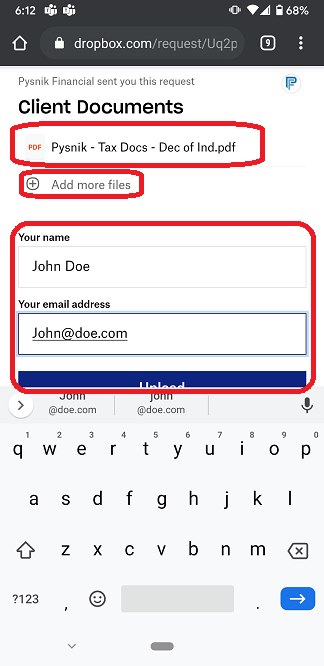
STEP 25: Enter the CLIENT NAME (person or business) and your EMAIL to receive an upload confirmation, and click UPLOAD.
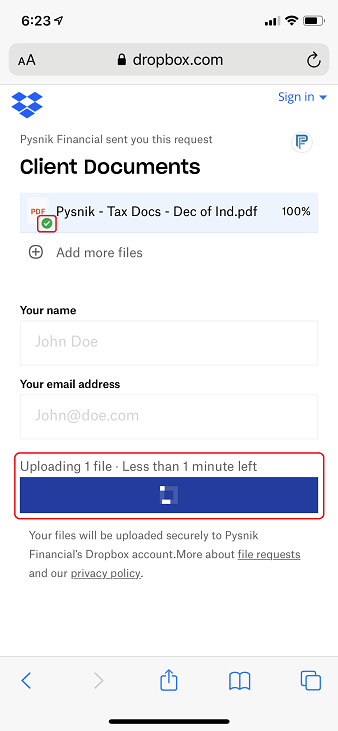
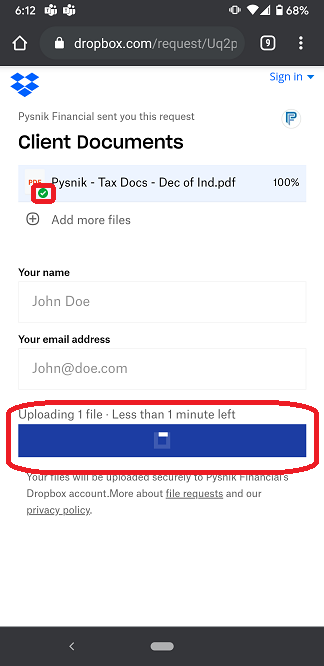
STEP 26: You will now see it uploading - DO NOT LEAVE THIS PAGE until you see the next page.
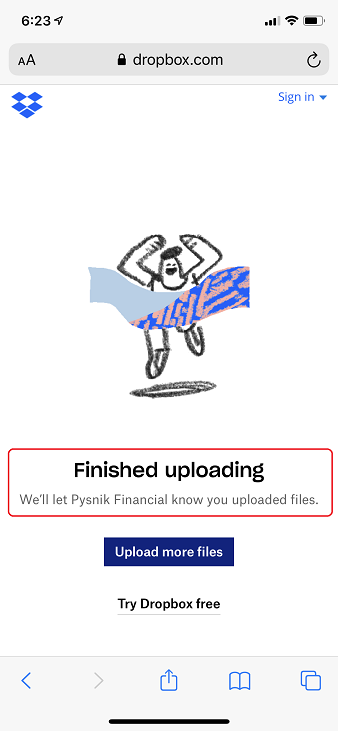
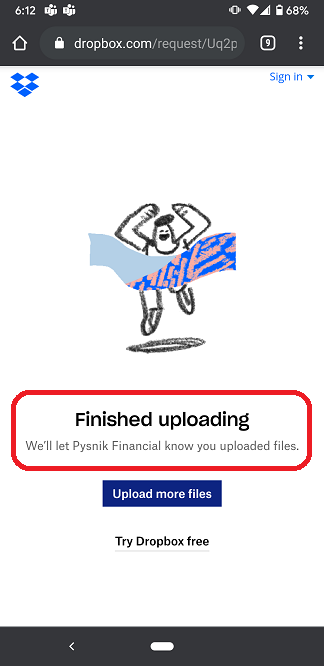
STEP 27: Once your files upload successfully, you should see an illustration of someone crossing the finish line. CONGRATS, YOU DID IT!
HOW-TO: Android Devices
Good framing versus bad framing - don’t be afraid to have some surface showing, the app will get rid of it for you!
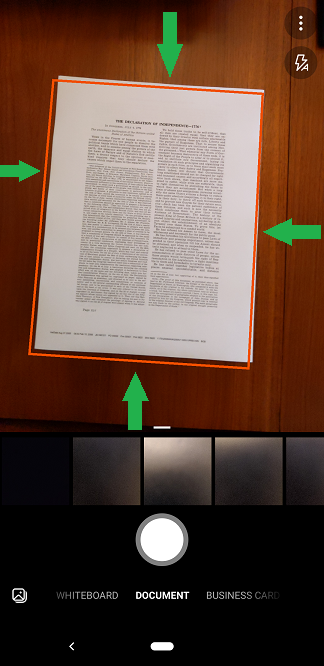
STEP 1: Place the first sheet down, square it up the best you can, and click the CAPTURE button.
STEP 2: You will get a preview of the image. If it looks good, click the CONFIRM button.
This will crop it to the border outlined and square things up for you automatically. Use the dots to adjust if necessary.
STEP 3: *IMPORTANT* If you have multiple sheets, click the BACK ARROW in the upper left, otherwise, skip to Step 11.
You should now have a live preview of your camera and a little “1” bubble on the red right arrow in the lower left.
STEP 4: Now flip to your next sheet of paper and tap the CAPTURE button again.
STEP 5: If the preview of page 2 looks good, click CONFIRM button again.
Step 6: Now it will take you directly back to the live preview to CAPTURE your next sheet of paper.
Step 7: Keep CAPTURING and CONFIRMING until the little NUMBER BUBBLE matches the number of sheets you want to scan.

You will now have a preview of all your captured pages together.
STEP 8: Most likely, you will need to select the FILTERS option in the lower tray to do some color-correcting.
STEP 9: You can select from many options to best suit your document’s needs, but DOCUMENT or BLACK AND WHITE will most likely give you the best results. Set the filter for each sheet you have scanned.
STEP 10: Once you’ve filtered the last page, select the DONE button in the lower right to start saving your document to your phone or tablet.
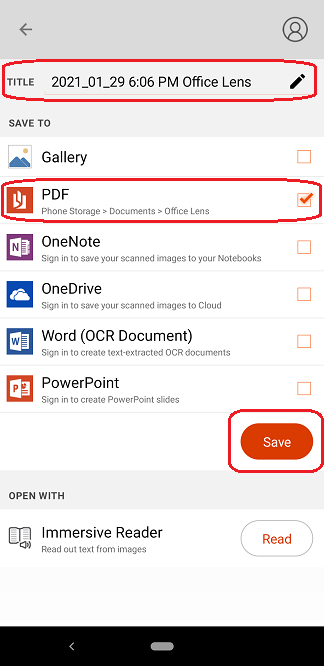
STEP 11: Now you will give your FILE A NAME - including your last name and a short description of the PDF is ideal (Smith - 2020 Tax Documents)
STEP 12: *IMPORTANT* Now select the PDF option.
STEP 13: Next select SAVE button.
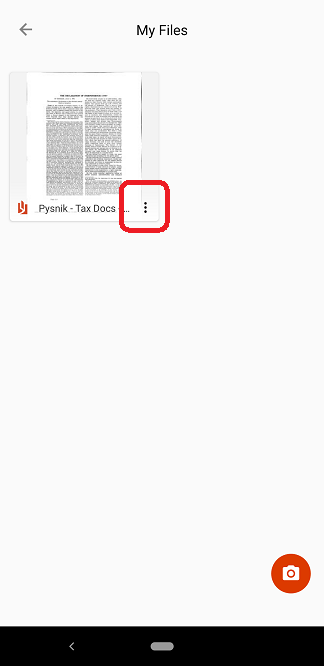
STEP 14: Tap on the THREE DOTS in the bottom right of the file you just made.
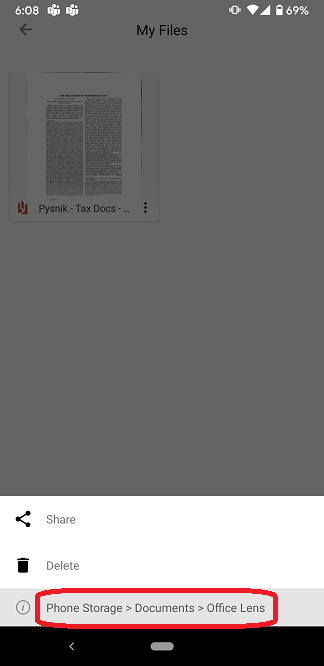
STEP 15: Look at the bottom of the tray that popped up and NOTE THE LOCATION of where it is saved on your Android.
Now that you have saved it to your phone or tablet, you can upload it to the Pysnik Financial FILE DROP.
STEP 16: Open CHROME or your web browser of choice.
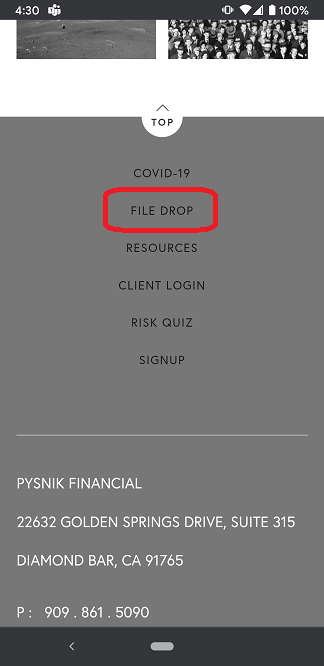
STEP 17: Go to PYSNIKFINANCIAL.COM and scroll down to the grey footer and tap on the FILE DROP link.
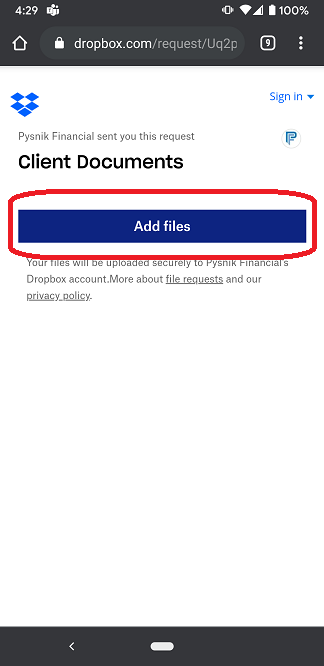
STEP 18: On the Dropbox website with the PF logo on it, select the blue bar that says ADD FILES
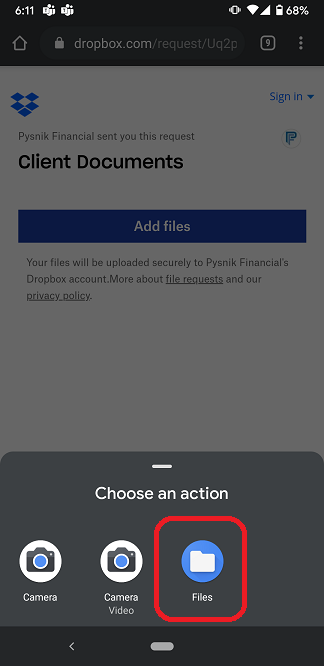
STEP 19: Tap FILES from the pop-up tray that is titled Choose an Action.
Now we need to find where we saved the PDF you created from the Lens app.
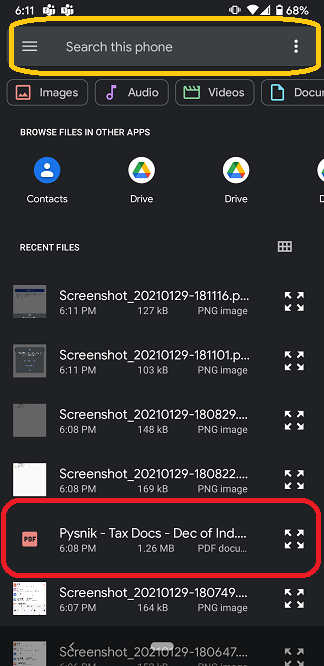
STEP 20: If you don’t immediately see it you will need to search for it in the SEARCH THIS PHONE bar at the top.
STEP 21: Your file should be listed at the top, under the RECENT FILES section.
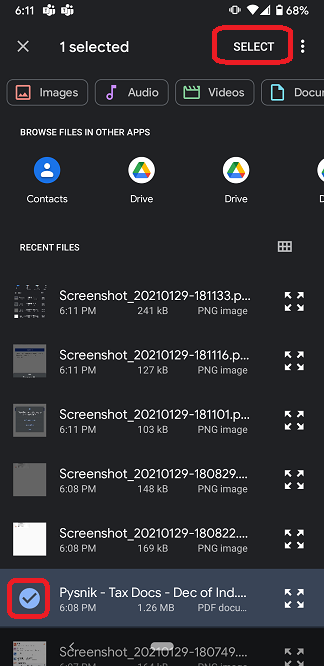
STEP 22: Tap on YOUR FILE(S) and tap SELECT in the upper right to attach them.
Now you should see your file(s) listed - you can go back and select addition if needed at this point.
STEP 23: Enter the CLIENT NAME (person or business) and your EMAIL to receive an upload confirmation, and click UPLOAD.
STEP 24: You will now see it uploading - DO NOT LEAVE THIS PAGE until you see the next page.
STEP 25: Once your files upload successfully, you should see an illustration of someone crossing the finish line. CONGRATS, YOU DID IT!
Also, here are instructions Microsoft provides for their app if you need additional information.
Written: Apple iOS & Google Android
Video: Apple iOS & Google Android